Do you know how to install a return air duct in the wall? If not, don’t worry! This blog post will teach you how. Installing a return air duct in the wall is a great way to improve your home’s airflow and help keep your HVAC system running more efficiently.
In this post, we will walk you through how to install a return air duct in the wall. We will also provide some tips on making the installation process more manageable. Let’s get started!
1. Choose Where You’ll Place The Ductwork
Determine the location of your return air ducts. Make a low-profile hole in the drywall for your return air grille. If you’re installing new return registers in an existing home, ensure you don’t cut any pipes or electrical wires.
Before continuing, make a tiny hole on the wall to see inside. The hole should be the same size as the grille. Cut through the floor via the hole. It should allow you to drill a hole into the joist gap in the basement ceiling. Repeat the process until you have the desired number of return air holes. Except for the bathroom, each room should contain at least one.
2. Make Holes for Vents
After determining where your intake vents will go, start by measuring the length and width of the vents you want to use. Ensure the aperture is the same size as the actual vents, not the whole vent. Create a smaller hole than the vent so its exterior half may be screwed to the wall.
Check your measurements before cutting through the drywall to the proper proportions. Test fit the vent once the hole has been cut.
3. Start Adding Panning and Insulation
After you have created the necessary holes, it is time to start adding panning and insulation. Start by placing a layer of fibreglass batting over any exposed ductwork. It will help to insulate the ductwork and prevent any air leaks.
Once the fibreglass batting is in place, you can begin installing the panning. Start by attaching the panning to the bottom of the joists using screws or nails. Work your way up, securing the panning to each side of the joists as you go.
Be sure to seal all seams with duct tape or another type of sealant. It will help to prevent any air leaks.
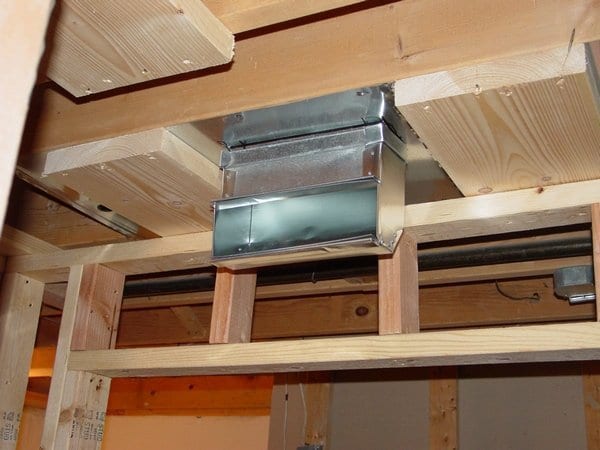
4. Add The Ducting
Get rid of any insulation from the area between the studs where the ducting will be routed. Then connect the ducting to the furnace or existing ductwork that is already returning air to the furnace along the path. It might extend from the ceiling to the walls and possibly the basement. Make sure the ducting complies with local regulations before starting construction.
You’ll need to prepare for corners when utilizing duct sheeting, a thick, hard, boxy material made to last. The preformed corner pieces are attached to the ductwork’s straight sections.
To install the corner piece, measure and snip the straight, rectangular ducting to the required length. Place the corner piece and move your way to the next corner in the same process, joining straight lengths as needed.
5. Place New Air Return Duct to Furnace
After the new air return duct has been installed, it’s time to place the new air return duct in the furnace. The plenum is a box-shaped component that joins the furnace to the main trunk line. It balances and equalizes the airflow so that all rooms in your home get an equal amount of conditioned air.
6. Install New Air Filter and Return Air Register Covers
Once the new return air duct has been installed, you will need to install a new air filter. The size of the filter will depend on the size of your furnace. Be sure to follow the manufacturer’s instructions when installing the new filter.
After installation is complete, turn on your furnace and check for any leaks in the system. If everything is working correctly, you should be able to feel the conditioned air coming through the vents in your home. Return air register covers should be placed over all of the vents in your home. You can purchase it at any hardware store.
Conclusion
Installing a return air duct in the wall is not difficult, but it is essential to follow the instructions carefully. With a bit of time and effort, you can quickly improve the overall efficiency of your home’s heating and cooling system. If you need help installing a return air duct, you can contact Furnace Repair Winnipeg for assistance. We will be more than happy to help you every step of the way. Contact us today to schedule a consultation.
We look forward to hearing from you!